May 3, 2024
July 7, 2022
June 24, 2022
January 24, 2022
October 28, 2021
July 8, 2019
November 26, 2018
September 22, 2017
June 9, 2017
September 27, 2017
July 24, 2017
September 22, 2017
September 27, 2017
November 26, 2018
January 30, 2019
The method of mixture is used almost universally by scientists as a quick, easy, and semi-accurate specific heat test for a solid sample, but what makes this method extra special is the fact that it’s so simple that high school students around the world perform it as a hands-on example of how the specific heat capacities of materials are a part of the world around us. This very same experiment can be done with very expensive equipment in a high-tech lab, or in a home kitchen with some glassware, and the only difference will be the accuracy of the results, which can be improved by repeating the experiment and using the average of the results.
The biggest factor in the accuracy of your results will be the quality of calorimeter you are using. Calorimeters are used to measure the heat transfer from a sample into a container of water. Calorimeters can now be found in a few different and very complicated forms in professional labs, but we will be focused on the simple crucible model, as that is what fits the needs of this experiment.
A calorimeter of this sort has a dry inner chamber for the sample, (a crucible), the walls of which are made of a material with a high thermal conductance. The middle chamber is filled with the water that will have its temperature measured with a built-in thermometer probe. Most calorimeters will also have a built-in stir rod to speed up reactions and heat transfers. On the other side of the middle chambers thin walls will be an air gap, and then a thick layer of insulating material.
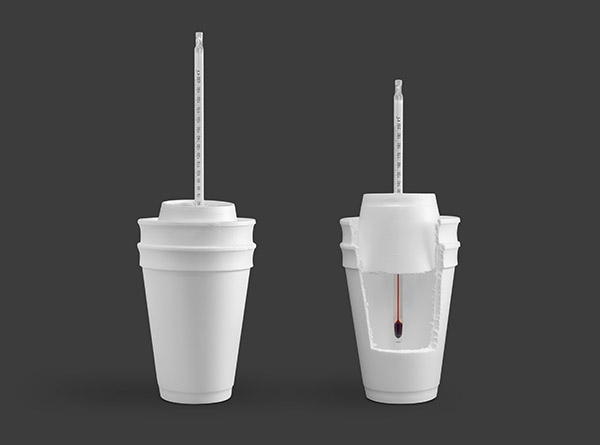
Professional calorimeters are designed this way to prevent heat from escaping as much as possible and they are often very expensive, but amateur, homemade, versions can be accurate enough for some uses. For example, if you nest two Styrofoam cups will make a water chamber followed by an air gap, then an insulating layer, as an inferior version of almost the same design of those that can be purchased.

It is important to note that in this experiment, the better insulated your calorimeter is, the more accurate your results will be. Loss of heat by conduction is the main cause of error in this experiment.
The theory behind this specific heat test is based on the conservation of energy. Heat is a form of energy, and in this case, it will be transferred between the sample and water. We will be measuring the change in temperature of the water in the calorimeter, which lets us calculate the change in heat of the water in the calorimeter, which we know to be equal and opposite to the change in heat of the sample. It should now be becoming clear how convenient this specific heat capacity test is, because the only thing to do once the experiment is on the way, is to measure is the change in temperature of the water, which is an indirect measurement of the change in heat of the solid.
Q = cmΔT
Q = change in heat
c = specific heat capacity
ΔT = change in temperature
Qw = – Qs
Qw = change in heat of water
Qs = change in heat of sample

Measure the mass of the sample (ms), and then weigh a beaker, then mostly fill the beaker with distilled water, weigh it again. Then to find the mass of the volume of distilled water (mw), subtract the mass of the beaker from the combined mass of the beaker and water. Then pour that water in the calorimeter and set that aside for a time to ensure the water reaches ambient temperature, then measure its temperature (Tiw).
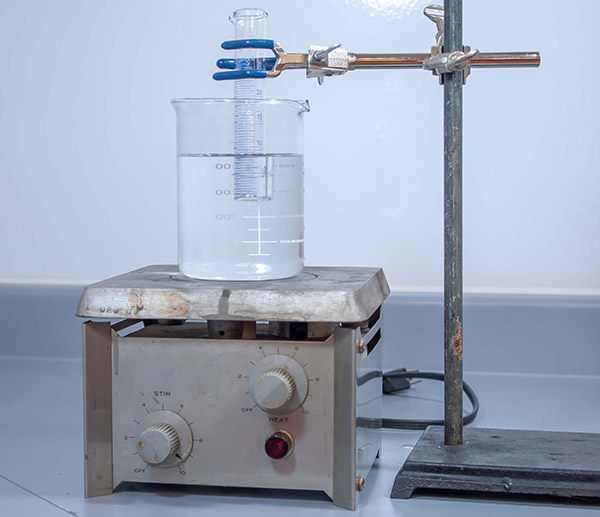
Fill the beaker with water again and set it on a hot plate until it reaches boiling, and keep the temperature steady, at just above boiling, measure that temperature, and record it as the initial temperature of the sample (Tis).
Set up the glassware stand so that it is holding the test tube with the sample so that the length of the tube containing the sample is completely submerged in the boiling water. Leave this for at least ten minutes so that the sample will be heated evenly. Make sure the tube isn’t touching the sides or bottom of the glass.
When you are confident that the sample is heated evenly, disconnect the test tube from the stand and pour the sample into the calorimeter and shut the lid. Do this as quickly as you can while still being careful as to minimize the time the sample spends in contact with the air. Be sure to prevent any water that was adhering to the test tube from dripping into the calorimeter.
Keep close watch over the temperature in the calorimeter, and when it stops increasing, record it as the final temperature of both the water and the sample (Tfw = Tfs).
Combing the equations for the change in heat,
Q = cmΔT
With the principle of conservation of energy,
Qw = -Qs
We get
cwmwΔTw = csmsΔTs
Which we can re-arrange to find the specific heat of the sample
cs = – cwmwΔTw / (msΔTs)
You can compare the result of the specific heat of your material with our thorough database, generated in our professional laboratory.
https://thermtest.com/materials-database
This experiment is an extremely quick and relatively precise specific heat capacity test for a solid sample. Anyone with access to a kitchen can do a form of this experiment and become a thermal physicist.
‘Theory of Heat’ – Maxwell, James Clerk – page 57-67 – Westport, Conn., Greenwood Press – 1970 :
https://archive.org/details/theoryheat04maxwgoog/page/n77
Talks about conservation of heat, the form and function of calorimeters, Method of Mixture
‘The Edinburgh Encyclopedia Conducted by David Brewster’, with the assistance of gentlemen eminent in science and literature the first American edition – Published by Joseph and Edward Parker in 1832 – page 294 :
http://bit.ly/2Lz2vdN
This is a discussion of Dr Joseph Black’s and Dr William Irvine groundbreaking discovery of specific heat capacity.
Dr. Joseph Black’s and Dr William Irvine’s original work on the concept of heat was published posthumously by the efforts of Dr John Robinso, as Dr. Black did not want to take the time away from his teachings to publish it. Below is a version of that research. Every version I found is behind a paywall.
https://www.tandfonline.com/doi/abs/10.1179/amb.1978.25.3.176 published by Arthur Donovan in 2013
The entirety of this experiment can be made at home, save for a thermometer, by switching out the lab equipment with regular kitchen ware.
You can make your own calorimeter by nesting two styrofoam cups and crafting a lid out of a third. Notice that nesting the cups will make a water chamber followed by an air gap, then an insulating layer, like in a professional calorimeter. Be sure to include a hole in the lid for the thermometer. You could also use a normal thermos as a calorimeter, as they are also designed to heavily reduce heat transfer of the interior with the surroundings.
You can just boil a pot of water on a stovetop, in place of the beaker and the hot plate.
You can use a pair of tongs as a replacement for a test tube, (as long as your sample is in one solid piece), preferably made of a plastic that won’t melt, so it won’t absorb to much heat, and the handle won’t get too hot. Be very careful and use thick oven mitts if you plan on holding it submersed in the boiling water for 10 minutes.
Note that the more surface area your sample has in relation to its mass, the more likely it will be heated evenly. The more mass your sample is, however, the more heat it will absorb and the give off, meaning the result will be more accurate. One way to account for both traits is for your sample to be in a lot of smaller pieces instead of one big piece.
If your sample is non-homogeneous, then the rule of mixtures can allow you to find the specific heat of one component if you know that of the others, or their relative masses if you know all the specific heats.
Author: Cole Boucher, Junior Technical Writer at Thermtest
Thermtest is furnishing this item "as is". Thermtest does not provide any warranty of the item whatsoever, whether express, implied, or statutory, including, but not limited to, any warranty of merchantability or fitness for a particular purpose or any warranty that the contents of the item will be error-free. In no respect shall Thermtest incur any liability for any damages, including, but limited to, direct, indirect, special, or consequential damages arising out of, resulting from, or any way connected to the use of the item, whether or not based upon warranty, contract, tort, or otherwise; whether or not injury was sustained by persons or property or otherwise; and whether or not loss was sustained from, or arose out of, the results of, the item, or any services that may be provided by Thermtest.