May 3, 2024
July 7, 2022
June 24, 2022
January 24, 2022
October 28, 2021
July 8, 2019
November 26, 2018
September 22, 2017
June 9, 2017
September 27, 2017
July 24, 2017
September 22, 2017
September 27, 2017
November 26, 2018
January 30, 2019

We are often asked about the difference between absolute and direct measurements of thermal conductivity. However, it is crucial to understand thermal conductivity first before delving into the differences.
At its core, thermal conductivity (TC) refers to a material’s intrinsic ability to transfer or conduct heat. It is fundamental in designing, engineering, and applying materials in critical heat transfer environments. Understanding TC is essential for optimizing thermal management systems, enhancing energy efficiency, ensuring safety, guiding material selection, driving innovation, and improving the performance and sustainability of products and processes.
Absolute thermal conductivity measurements are performed independent of thermal conductivity calibration materials, whereas direct (calibrated) thermal conductivity measurements use a single (or sometimes multiple) calibration reference material to cover a range of thermal conductivity. Both absolute and direct measurements have their advantages and disadvantages and scenarios they are best suited to.
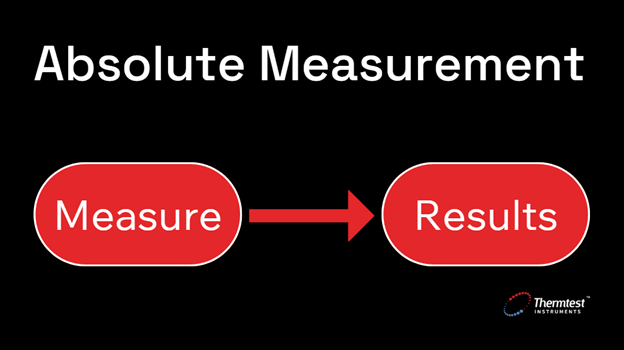
Absolute thermal conductivity measurement is performed independently of any calibration materials. This type of measurement is considered non-comparative and is accepted as having the highest accuracy possible – because it does not rely on the properties of a reference material to determine the thermal conductivity of the test material.

Figure 1. Absolute thermal conductivity measurement requires no calibration.
The design of absolute methods of measuring thermal conductivity yields results that are unaffected by the thermal properties of the materials constructing the measuring device. These methods are based on fundamental physical principles and do not require calibration against materials of known thermal conductivity. The results obtained from absolute methods are considered independent of the particular measuring device and are not affected by the thermal properties of the materials used to construct the source.
There are only a few recognized absolute methods for measuring thermal conductivity, including:
These absolute methods are crucial for ensuring the accuracy of thermal conductivity measurements and are often used to test calibration materials that are then used in calibrating comparative methods.
Measurements are independent of any calibration materials, leading to highly accurate results because they do not rely on the properties of a reference material.
The results obtained are purely based on the material’s properties, without the need to compare them to a known standard or reference material, eliminating the potential errors and uncertainties associated with comparative methods.
Versatility is crucial for research and development in various fields, and absolute methods can accurately measure TC across a wide range of materials, including solids, liquids, and gases.
Absolute thermal conductivity measurements are often used to test calibration materials, which are then used in calibrating comparative methods, ensuring higher accuracy and reliability in comparative methods measurement.
The results obtained using absolute methods are considered independent of the measuring device used. This independence from the materials used to construct the device ensures that the measurements are solely reflective of the material’s thermal properties, not influenced by the device.
Absolute methods for measuring thermal conductivity can be influenced by outside factors, whereas comparative tests are more controlled and straightforward.
Many factors need to be considered when analyzing data and calculating absolute measurements. These additional factors can make it challenging to determine thermal conductivity accurately.
Some absolute methods are associated with high measurement uncertainties, which can affect the reliability of the obtained thermal conductivity values.
Determining heat loss can be difficult with steady-state methods, especially at high temperatures, which can affect the accuracy of the thermal conductivity measurements.
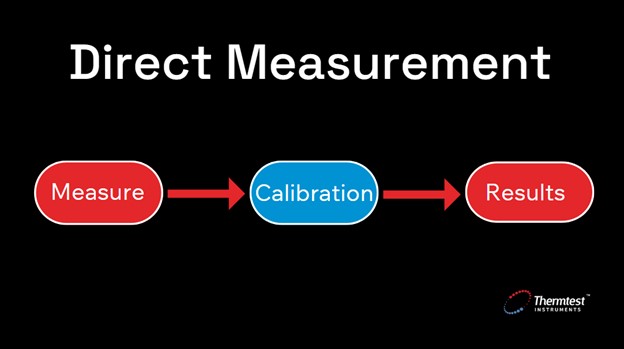
Direct (or calibrated) thermal conductivity measurement, also referred to as the comparative method, involves using one or more calibration reference materials to determine the thermal conductivity of an unknown sample. This method contrasts with absolute measurements, which do not rely on calibration materials and are considered to provide the highest accuracy. In the direct or comparative approach, the accuracy of the result is a composite value based on the accuracy of the absolute method used to measure the reference materials and the comparative device itself.

Figure 2. Direct, or calibrated, thermal conductivity measurement requires calibration.
The process typically involves the following steps:
A material with a known TC is selected as a reference material. This selection is crucial because the accuracy of the direct measurement significantly depends on the calibration material’s known properties.
The sample and the calibration material are subjected to similar conditions where a known amount of heat is applied. The setup used is dependent on the specific method used but generally involves placing the sample and reference material in a manner that allows for controlled heat flow.
The response of both the sample and the calibration material is monitored while heat is applied to the system. This can involve measuring the temperature change over time or the steady-state temperature distribution within the materials.
The thermal response of the sample is directly compared to that of the calibration material previously selected. Since the TC of the calibration material is known, the TC of the sample can be determined by analyzing the differences in their thermal responses under the same conditions.
To achieve the best accuracy, efforts are made to ensure equal heat flow between the calibration material and the sample. The composite accuracy of the result is influenced by the precision of the absolute method used to measure the reference materials and the comparative device itself.
Calibrated results are more consistent across different measurements or experiments because they are adjusted to a common scale or reference point. This consistency enhances the reliability of the data and makes it easier to compare results obtained from different sources or instruments.
Calibration helps to correct any systematic errors or biases in measurements, leading to more accurate results. By calibrating instruments or models against known standards, researchers can ensure that their measurements are as accurate as possible.
Calibrated results are typically traceable to national or international standards, providing a clear lineage of measurements. This traceability enhances the credibility and trustworthiness of the results, especially in fields where accuracy is critical, such as metrology, environmental monitoring, and healthcare.
Calibration is an essential component of quality assurance processes, ensuring that instruments and measurement systems perform reliably and consistently over time. By regularly calibrating instruments, organizations can maintain the quality and reliability of their measurements, reducing the risk of errors and ensuring compliance with regulatory requirements.
Some steady-state methods, like the Guarded Hot Plate (GHP), can be very time-consuming because they require the system to reach a steady-state condition before measurements can be taken, which can slow down the overall process.
A well-engineered experimental setup is usually needed to achieve high accuracy, which can lead to increased costs and the need for specialized knowledge to operate a complex device.
High measurement uncertainties can be associated with some methods, particularly when dealing with high thermal conductivity materials, because the influence of contact resistances becomes larger, affecting the reliability of the TC values obtained.
Determining heat loss can be difficult with steady-state methods, especially at high temperatures, which can affect the accuracy of the TC measurements. Heat losses from the device, particularly in parallel plate and concentric cylinder methods, can introduce errors.
The thermal properties of fluids can be more challenging to study experimentally due to the presence of convective and radiative energy transport unless measures are taken to limit these processes. Additionally, forming an insulating boundary layer can result in an apparent reduction in the TC, complicating measurements.
Direct thermal conductivity measurements are widely used because they can be more straightforward and less time-consuming than absolute measurements. However, the accuracy of direct methods is inherently dependent on the accuracy of the calibration material’s known thermal conductivity and the precision of the comparative measurement setup. This method is beneficial when absolute methods are not feasible, or a quick comparative analysis is needed.
The Transient Plane Source (TPS) method is an absolute method, often relied on to test calibration materials used to calibrate comparative methods.
Transient Line Source (TLS): The TLS is an ASTM D5334 method for testing soils and similar materials. This method requires a single or multi-point calibration with reference materials of similar thermal conductivity tested by an absolute method like the TPS.
Transient Hot Wire (THW): The THW is an ASTM D-7896 method for testing liquids. This method requires a single-point calibration with a reference material of similar thermal conductivity tested by an absolute method like the TPS.
Transient Hot Strip (THS): The THS method for testing solids. This method requires a single-point calibration with a similar thermal conductivity reference material tested by an absolute method like the TPS.
Modified Transient Plane Source (MTPS): The MTPS method is used for testing solids and small particle powders. It requires a multi-point calibration with reference materials of similar thermal conductivity tested by an absolute method like the TPS.
Heat Flow Meter (HFM): The HFM is an ASTM C518 for testing low thermal conductivity material. This method requires a single-point calibration with similar thermal conductivity reference materials tested by an absolute method like the TPS or Guarded Hot Plate (GHP).
Guarded Comparative Longitudinal Heat Flow (GCLHF): The GCLHF is an ASTM E1225 method for testing ceramics, polymers, and metals. This method requires a single-point calibration with similar thermal conductivity reference materials tested by an absolute method like the TPS.
Guarded Heat Flow Meter (GHFM): The GHFM is an ASTM E1530 for testing solids. This method requires a single-point calibration with a similar thermal conductivity reference material tested by an absolute method like the TPS.
In summary, while absolute and direct thermal conductivity measurements offer valuable insights into material properties, they serve distinct purposes and are suited to different scenarios.
Absolute measurements are conducted independently of any calibration materials, ensuring the highest accuracy by relying solely on the material’s intrinsic properties. This method is particularly valuable in settings where precision is critical, although it can be time-consuming and complex. On the other hand, direct measurements use calibration materials to establish a baseline, allowing for quicker and often more practical assessments in comparative analyses.
The choice between absolute and direct methods should be guided by the application’s specific requirements, considering factors such as the required precision, available resources, and the nature of the materials being tested. Understanding these differences is crucial for selecting the appropriate measurement technique to ensure accurate, reliable results in thermal conductivity studies.